Build configurations are useful for a handful of reasons. If you are developing an app that's currently in production, chances are you are switching from your production API endpoints to some kind of test environment endpoints for development. Of course you can do the "comment/uncomment URL constants" dance everytime you need to switch environments, but other than being a tedious and error-prone process there are cases where build configurations are unavoidable.
Take automated builds for example, be it custom nightly build scripts or some ultra-fancy CI pipeline. The number one rule of automated build is that you have to be able to produce a build for your project with a "single command". Which is not the case if you need to comment/uncomment lines every time you build in order to point to the correct environment.
Unfortunately (at the time of writing this post) the way to set up build configurations in Xcode is not very straightforward and it certainly does not feel as user friendly as other Xcode features. But let's dive into it.
Create a Configuration File
Go to File -> New -> File (or cmd + N) and select the "Configuration Settings File" template.
A Configuration Settings File (a file with a .xcconfig file extension) is a plain text file that defines and overrides the build settings for a particular build configuration of a project or target.
We'll create one file for Production, called Production.xcconfig and another one for Development called... you guessed it, Development.xcconfig
Define build variables
Let's say that we want to be able to configure a backend endpoint and the app's display name.
We can add the following to Production.xcconfig:
BACKEND_URL = https:/$()/my.production.api/v1
APP_NAME = Production
and Development.xcconfig
BACKEND_URL = https:/$()/my.test.api/v1
APP_NAME = Development
$() denotes an empty variable substitution. It's used in order to escape the double dash so that the part following it is not treated as a comment. A minor annoyance, but quite handy when you know it!
Another way to go about customising existing target build settings is to override settings such as PRODUCT_NAME. I do not prefer this approach since dealing with build setting levels and inheritance can be a tedious. Instead, I use only new variable names and assign them to the corresponding values in info.plist (more on that later)
Create New Build Configurations
Press the "+" icon and select which basic configuration you want to duplicate, release or debug in this case. I will go for release for Production and debug for Development.
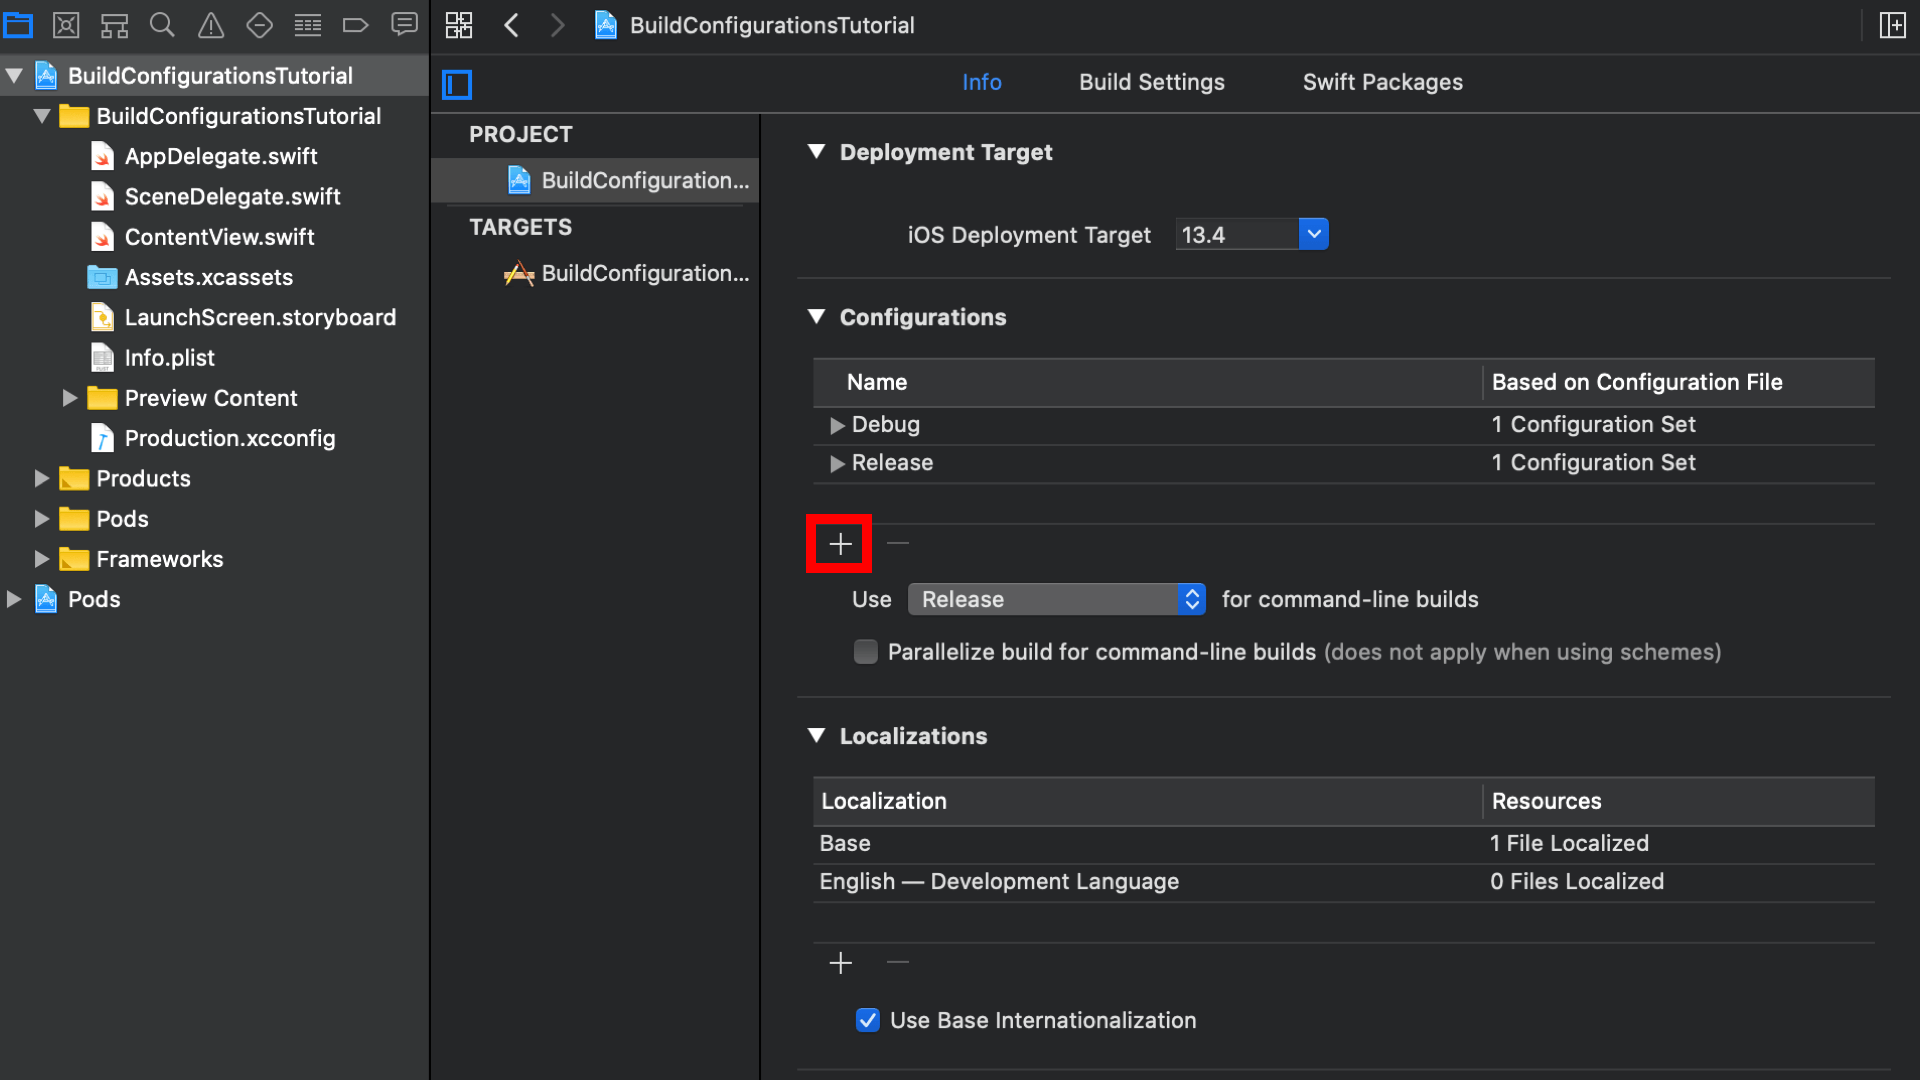
Then select which configuration file this build configuration is based on. You can define this for the whole project or for specific targets.
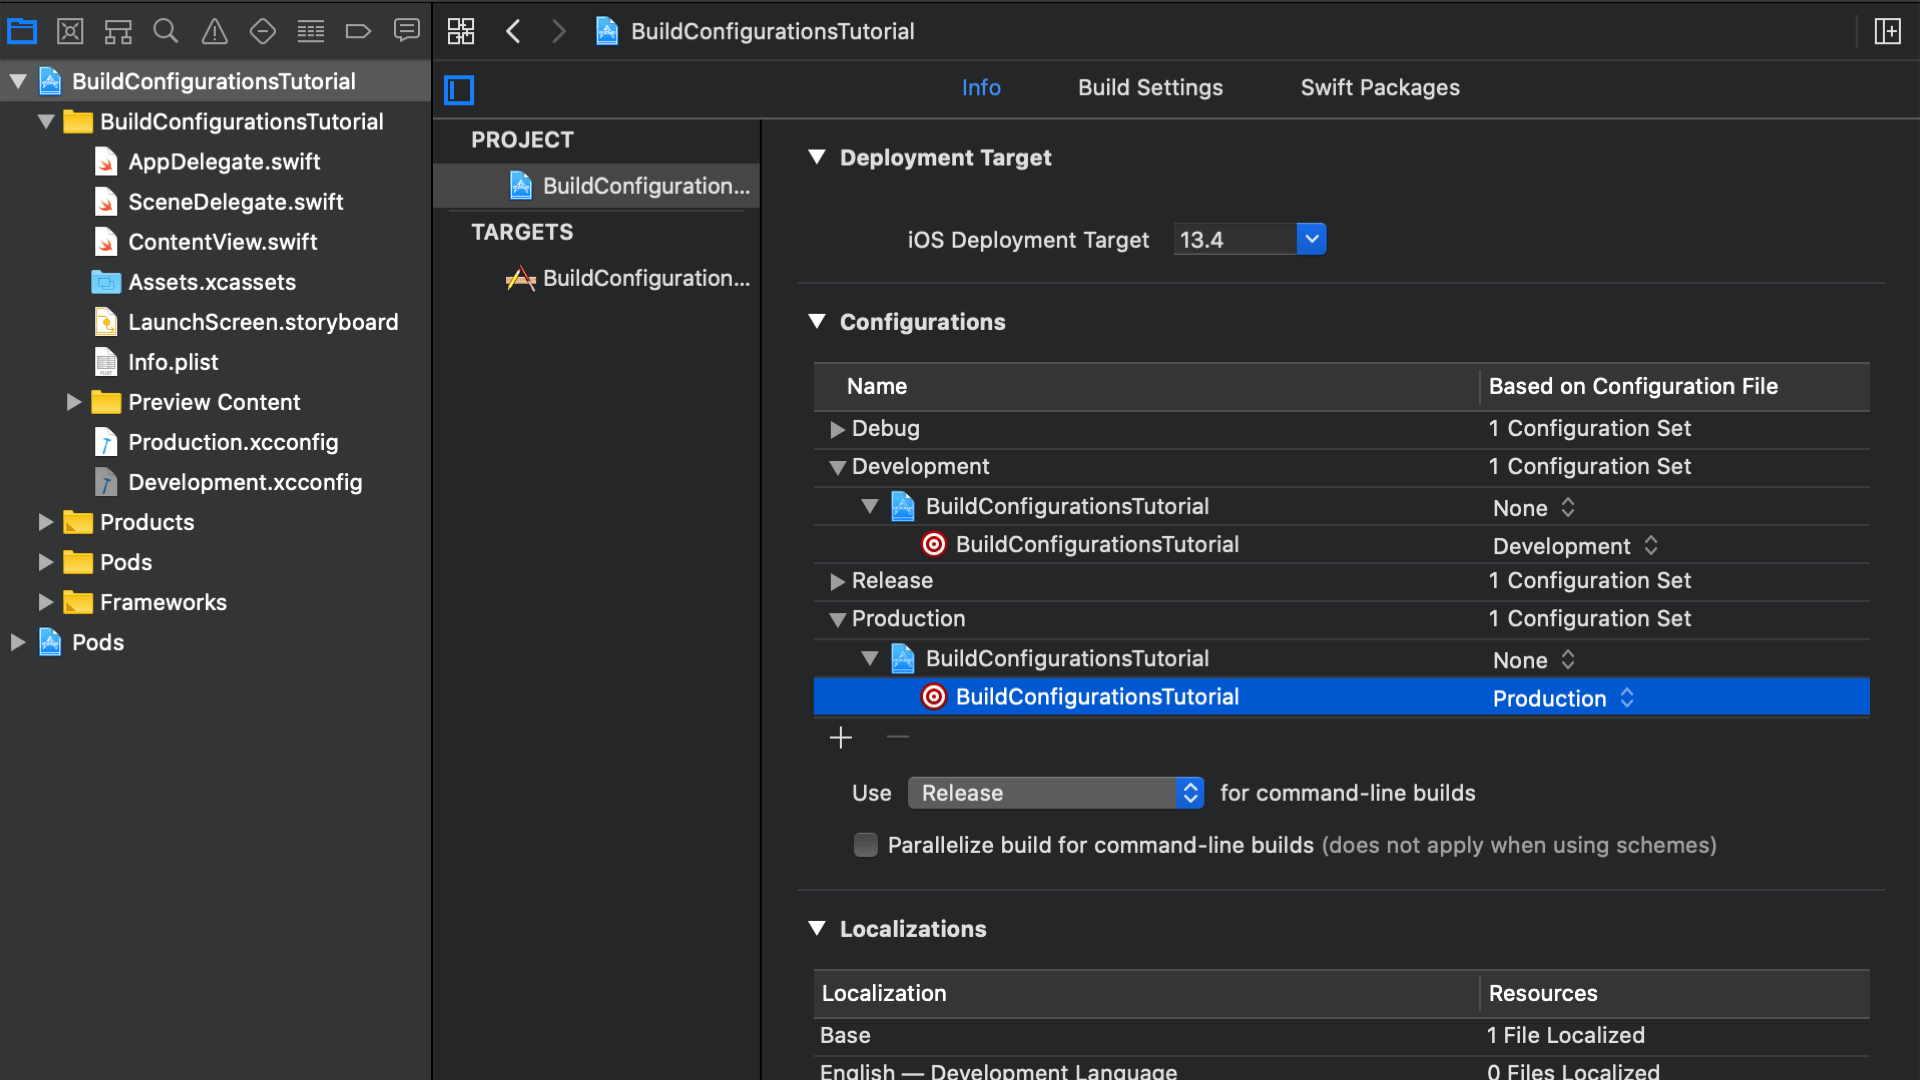
Assign Build Configurations
Now if we navigate to "Edit Scheme" for the current scheme, our just defined build configurations are avaiable to select for the different actions.
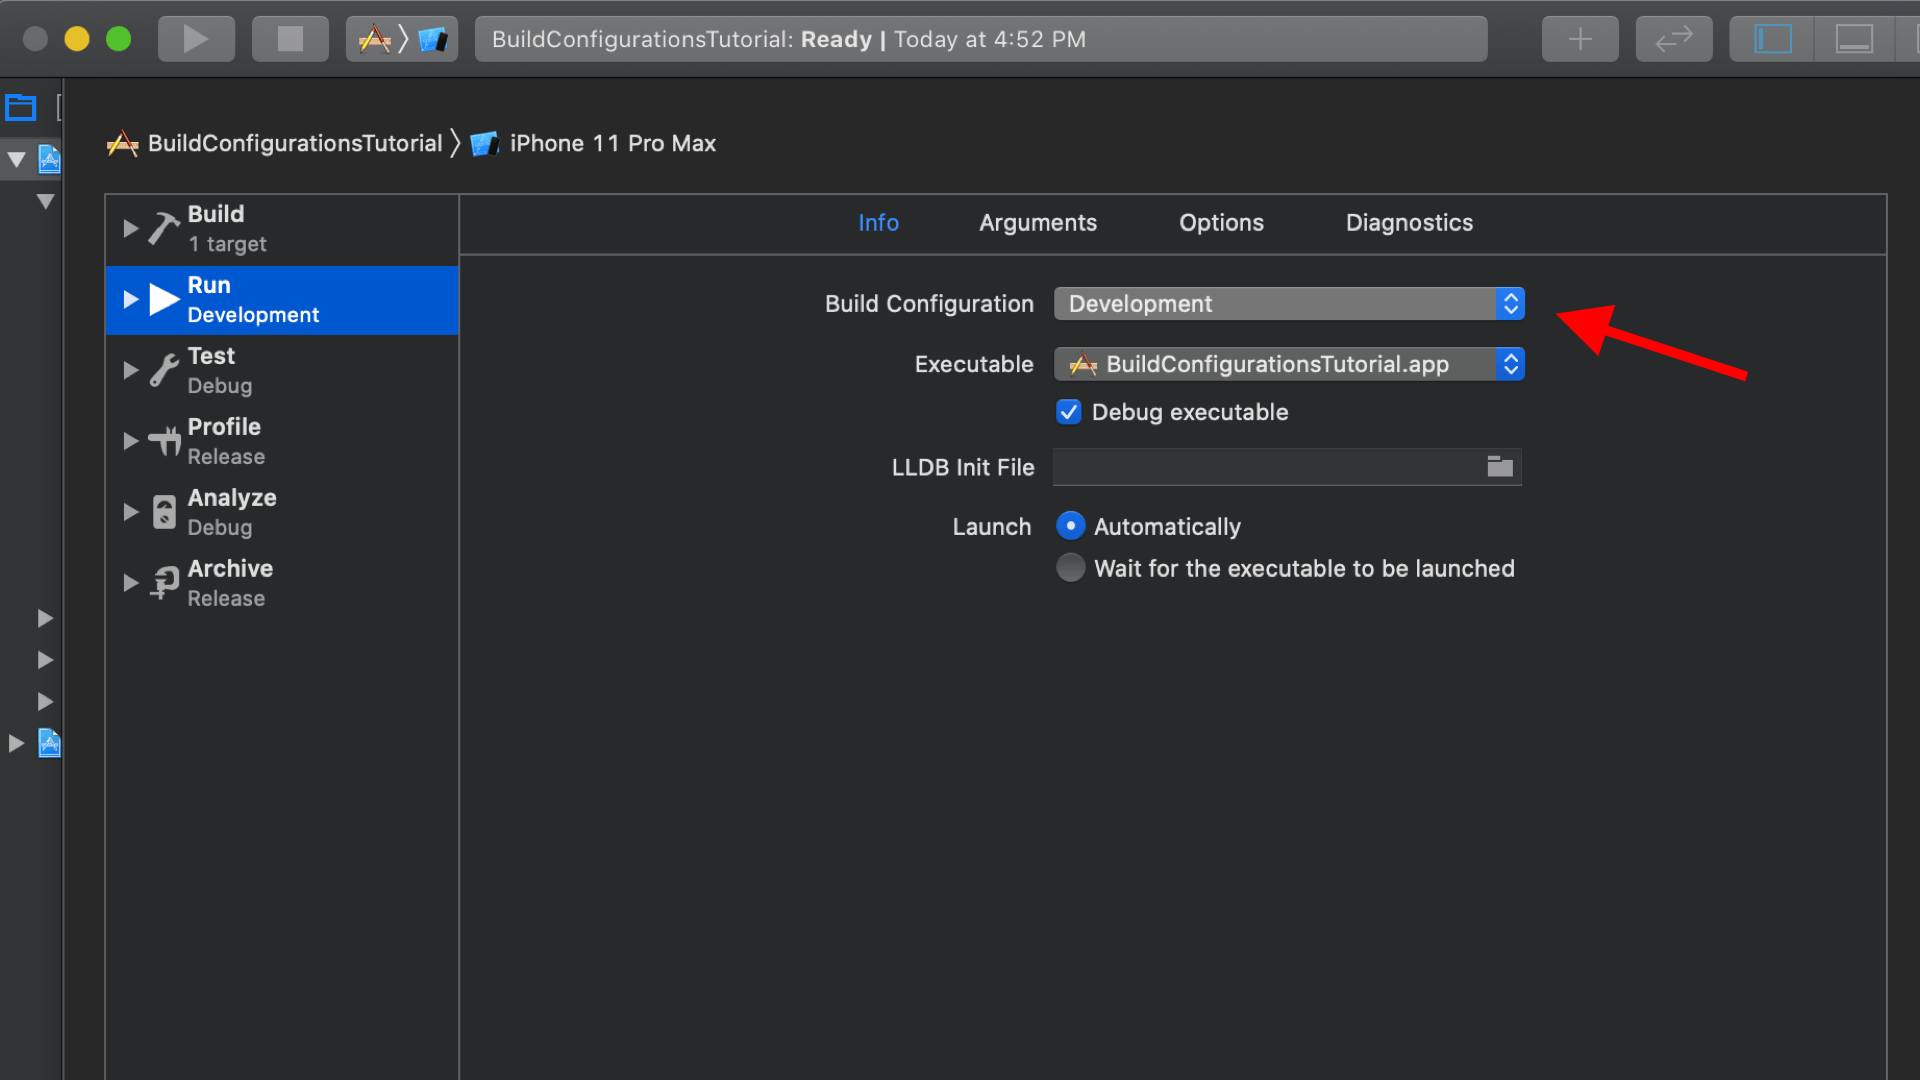
If it wasn't for cocoapods our project would build and run right now, but we'll deal with that later. First let's make some custom schemes so that we can easily switch between the various build configurations.
Create Custom Schemes
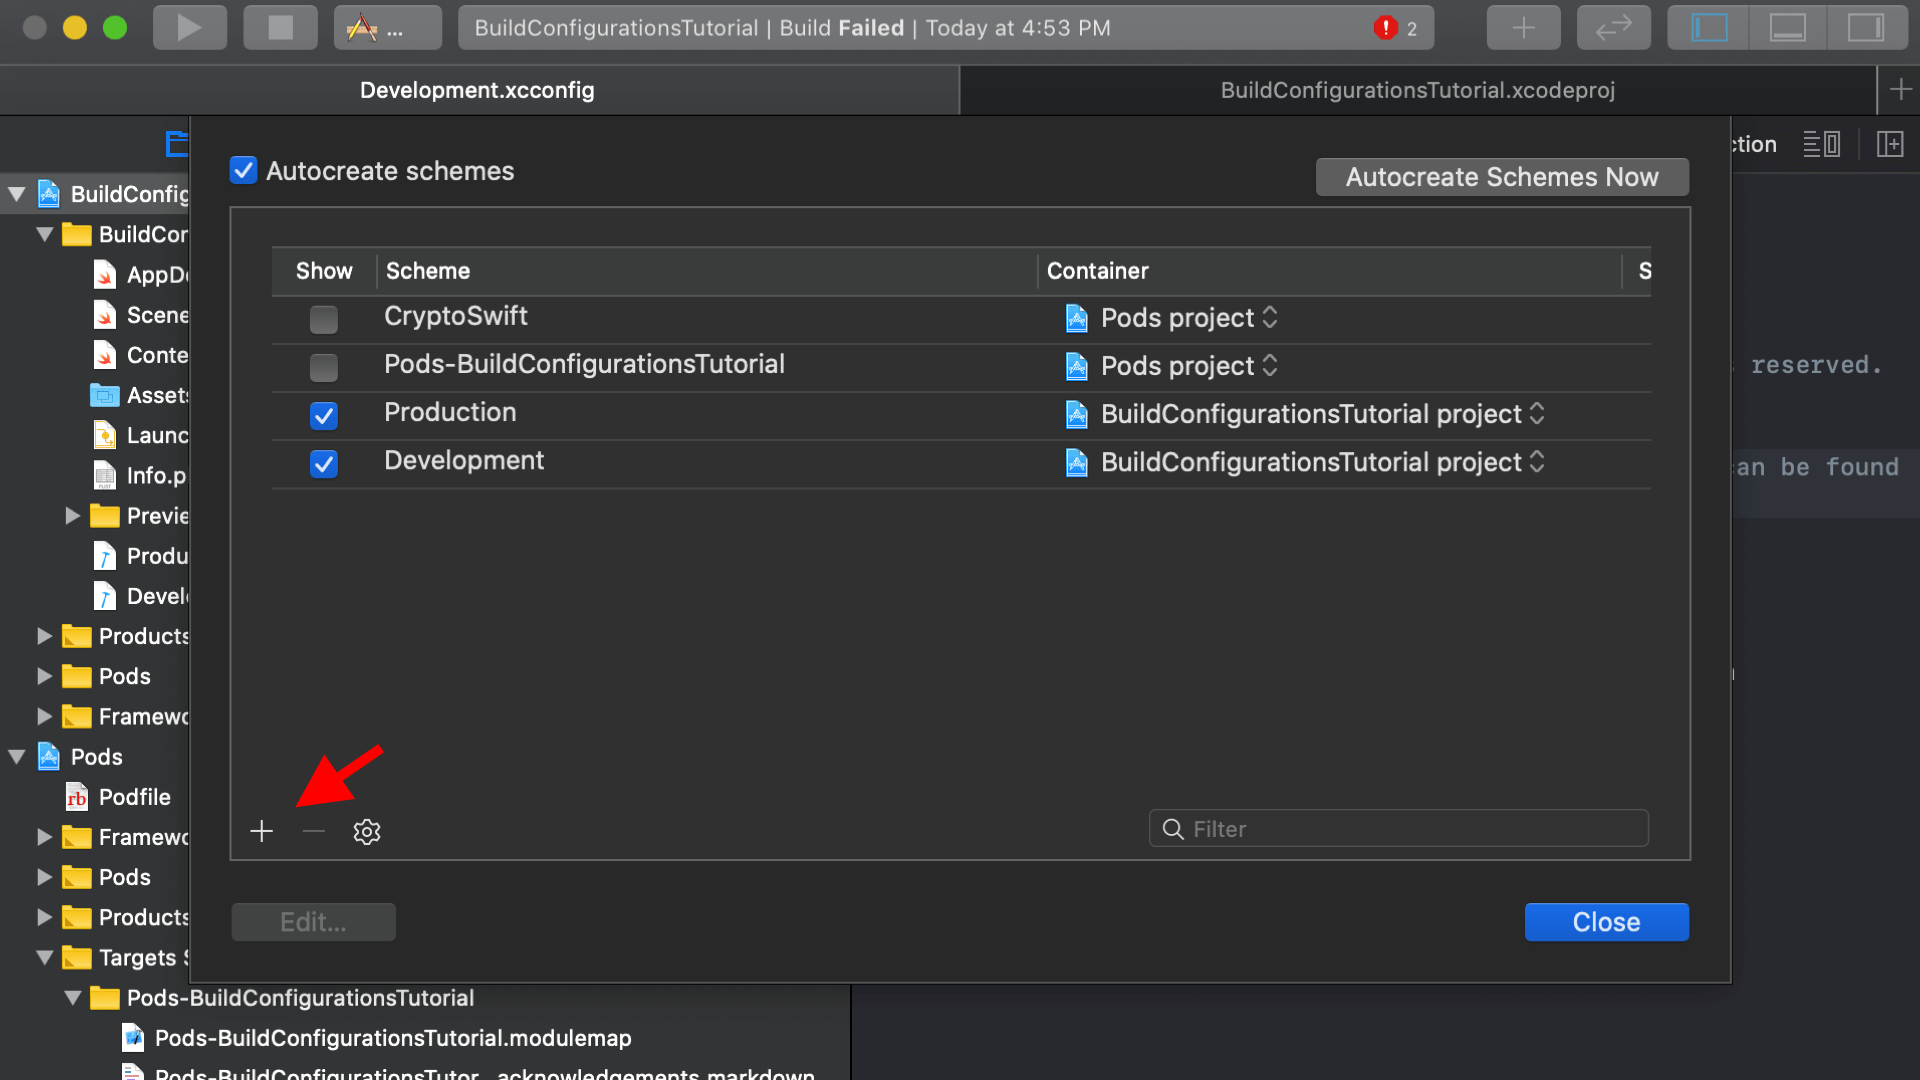
I usually delete (select and click on the "-" icon) the default scheme and create new ones for each configuration. From the "manage schemes" menu, let's create two new schemes named Production and Development using the default target. Don't forget to edit the schemes to run the corresponding build configuration on Run
Cocoapods
If you are not using cocoapods you can skip this section.
In order to make cocoapods integrate nicely with our custom build configurations we need to:
-
Add custom build configurations to PodFile
Specify where your build configuration is derived from so that Cocoapods can create its own build configuration for the project's dependencies
project 'BuildConfigurationsTutorial', 'Production' => :release, 'Development' => :debug -
Run pod install from the root of your project
Open up a terminal in the root directory of your project and run:
$: pod installCocoapods will create its own .xcconfig files located in the /Pods/Targets Support Files/<Project Name>/ folder of your workspace. One for each build configuration in the project.
-
Include the cocoapods build configs in the custom configuration files
Configuration files can include other .xcconfig files. In Production.xcconfig add:
#include "Pods/Target Support Files/Pods-BuildConfigurationsTutorial/Pods-BuildConfigurationsTutorial.production.xcconfig"And similar for Development.xcconfig
#include "Pods/Target Support Files/Pods-BuildConfigurationsTutorial/Pods-BuildConfigurationsTutorial.development.xcconfig"
Assign build variables to info.plist
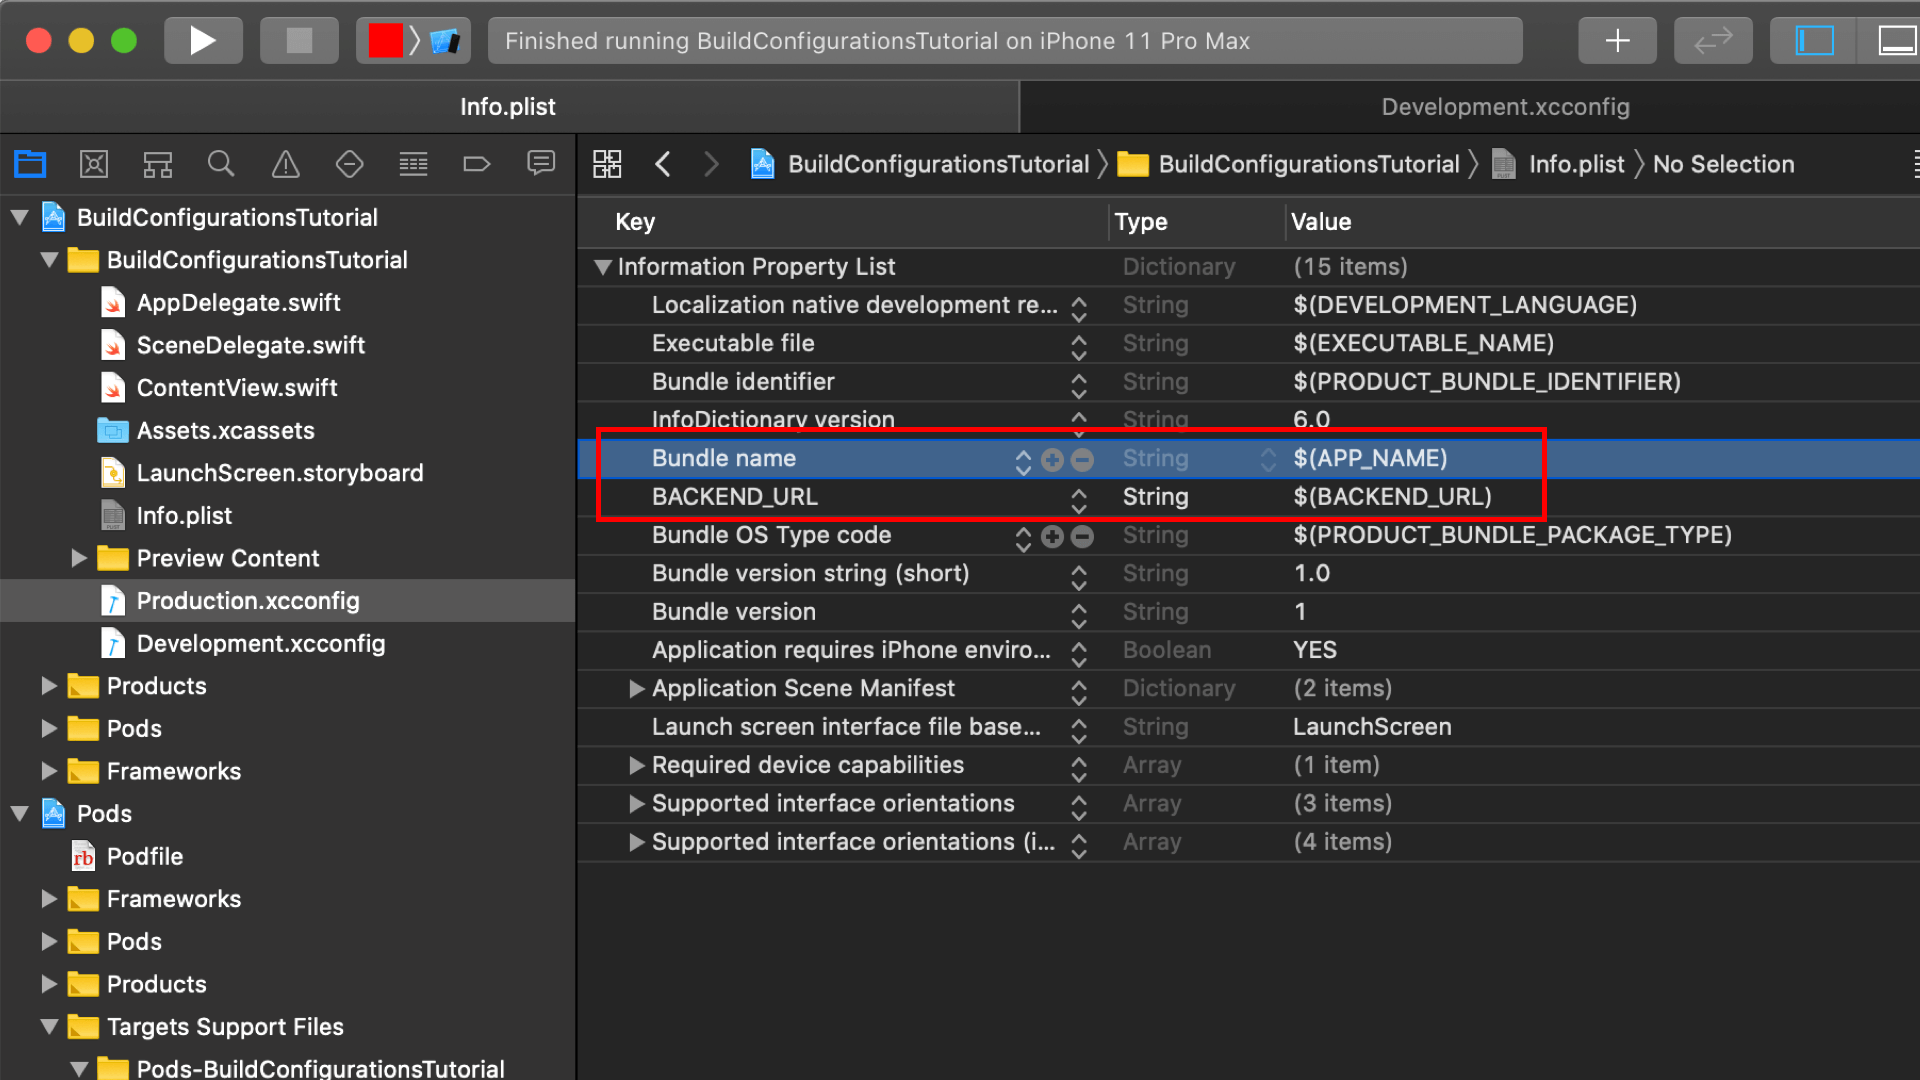
In the project's info.plist you can assign build variables as values using variable substituion i.e $(VARIABLE_NAME) notation. For the Bundle Name key we can use $(APP_NAME) and we can create a new key (right click + add row) named BACKEND_URL and assign $(BACKEND_URL) to it
Access build variables from code
Add the following to a BuildConfiguration.swift file in your project:
private enum BuildConfiguration {
    enum Error: Swift.Error {
        case missingKey, invalidValue
    }

    static func value<T>(for key: String) throws -> T where T: LosslessStringConvertible {
        guard let object = Bundle.main.object(forInfoDictionaryKey: key) else {
            throw Error.missingKey
        }

        switch object {
        case let string as String:
            guard let value = T(string) else { fallthrough }
            return value
        default:
            throw Error.invalidValue
        }
    }
}

enum API {
    static var backendURL: String {
        do {
            return try BuildConfiguration.value(for: "BACKEND_URL")
        } catch {
            fatalError(error.localizedDescription)
        }
    }
}
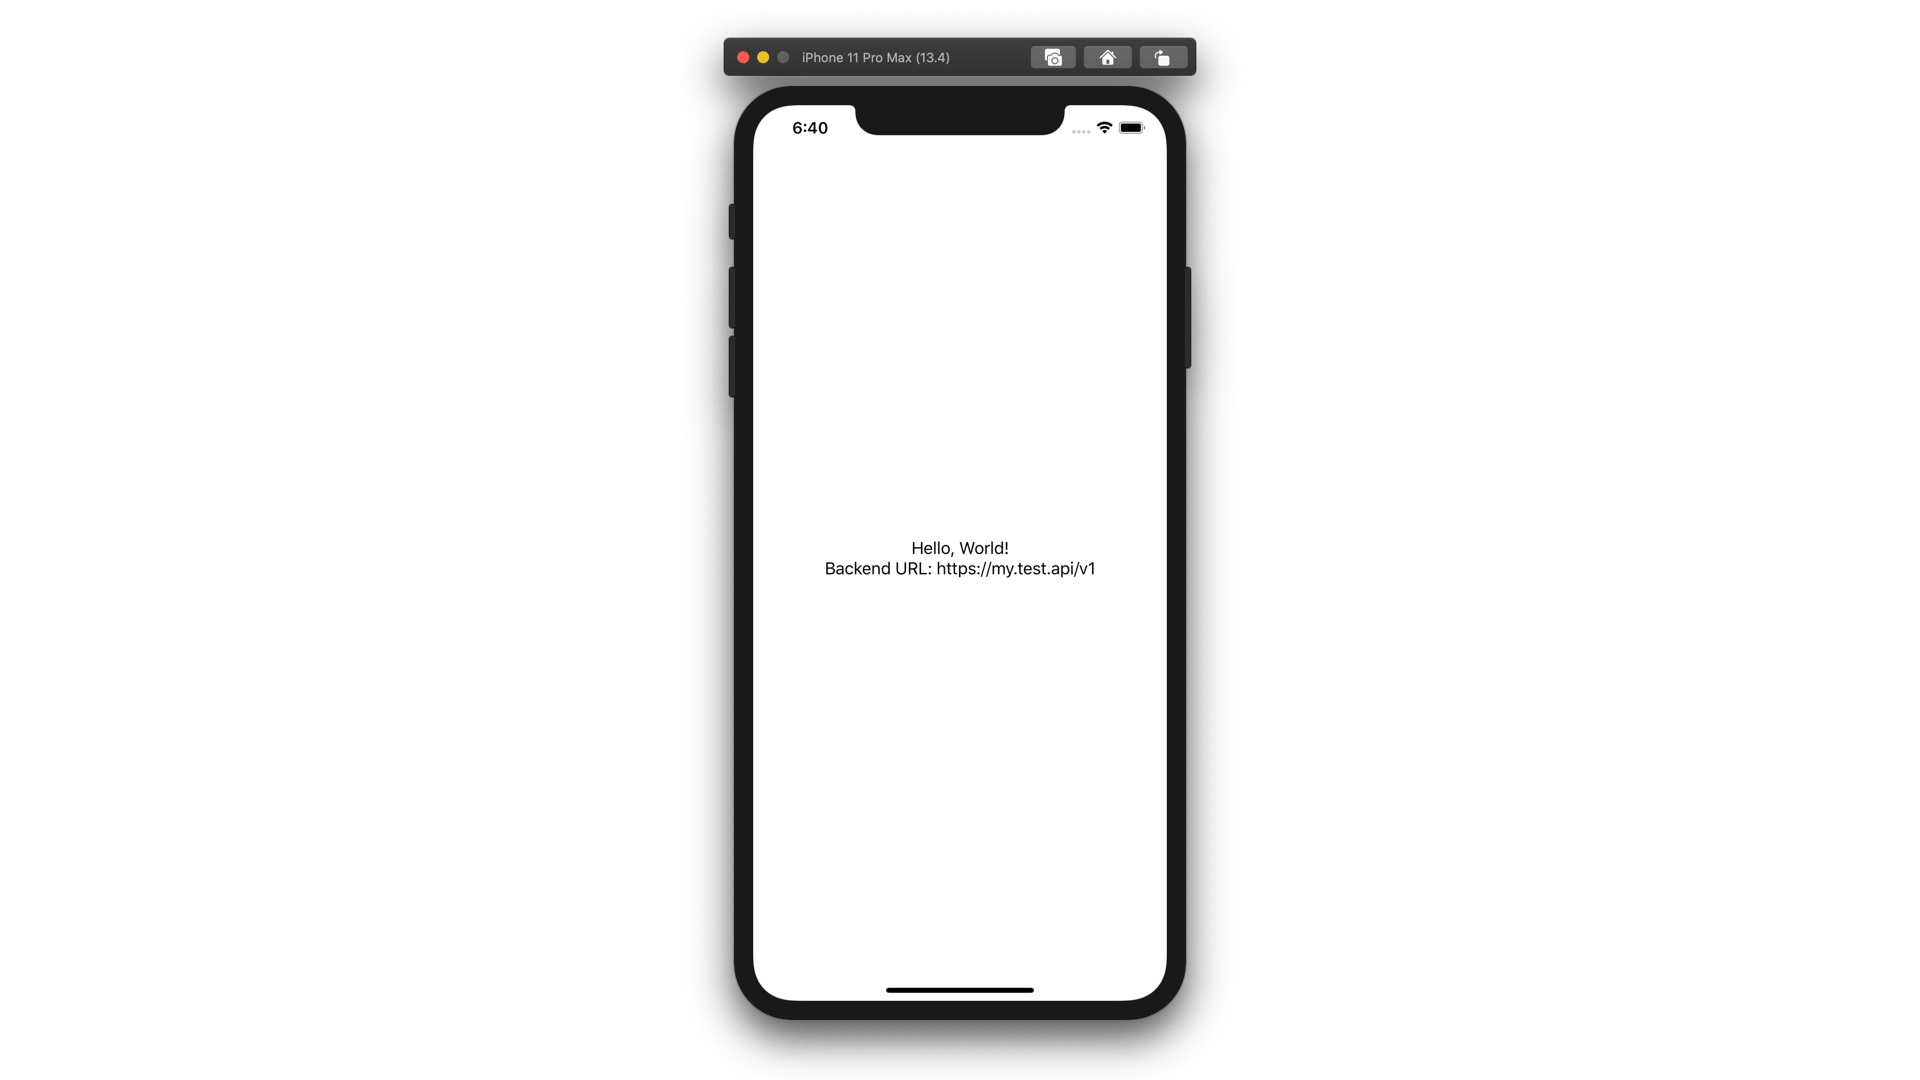
Then anywhere you need to access the backend URL you can access it using the enum static variable
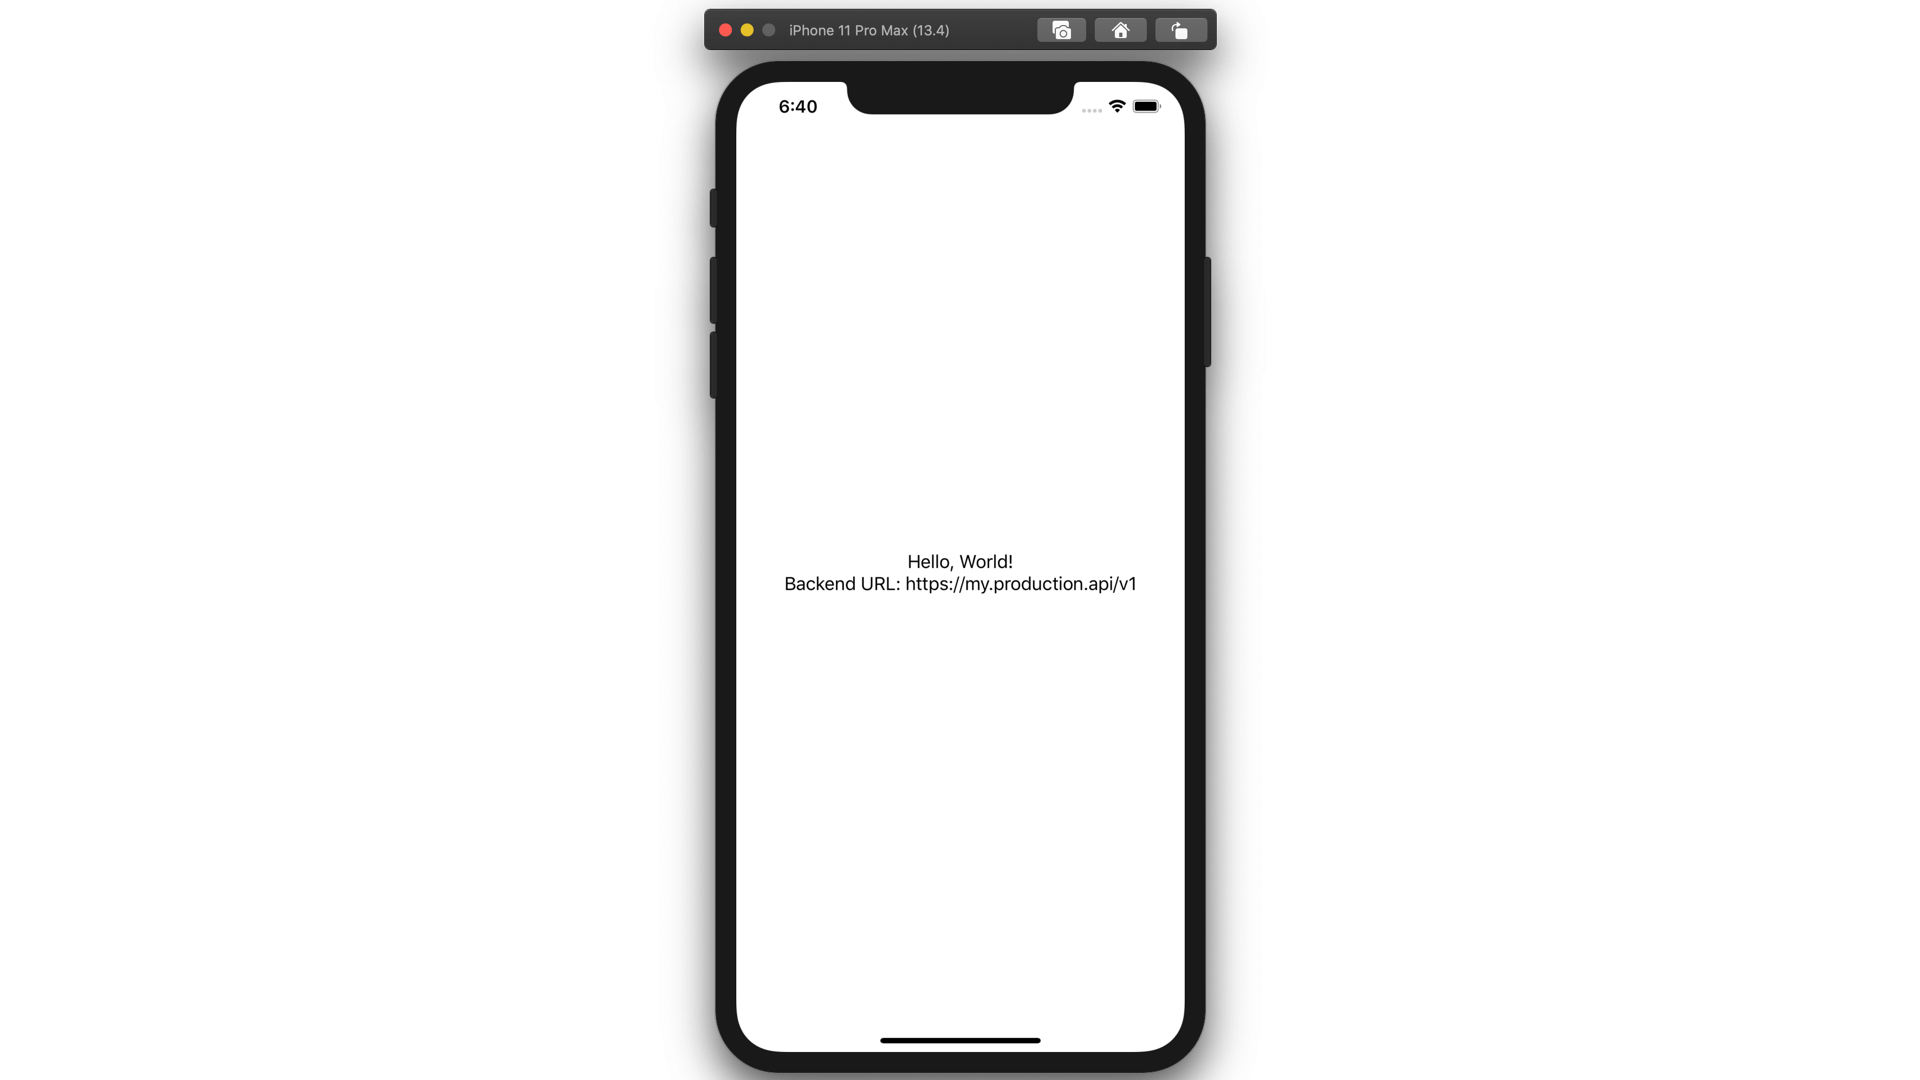
Text("Backend URL: \(API.backendURL)")
Build and Run
Building the Production scheme:
Building the Development scheme: